My homebuilt Scope Camera
A digital camera for taking waveform pictures
from the
scope screen
Last update: 11-09-2010
This page will be updated at irregular intervals
Web
Counter reports
 visitors
since
10/30/2010
The project:
What follows is a description of how I approached the building of my scope camera and the results. It doesn't try to be a step by step guide for replicating it, since the main parts like the hood and the camera itself depends of what you have and what you can find, but it is explanained the reasoning that I followed, some of the difficulties found and why I did the things in such a way and not in another. I hope that it can be of some help and motivation for anybody who wants to do a proyect like this.
I
always
wanted to have a way to keep pictures of my scope
screen for
documenting
my projects. Not having
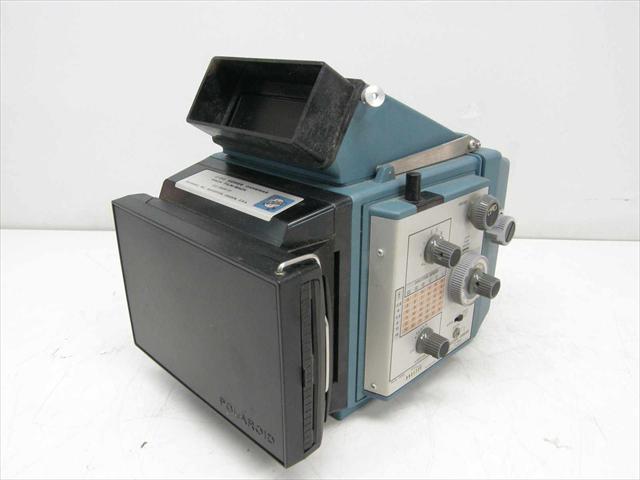
a digital scope, the classical way was to use a Polaroid scope
camera
(I made a lot of pictures that way some 25 years ago) but
this is now out of question, even the cheap surplus ones can not
be
used because of lack of film.

A Tektronix C50 scope camera
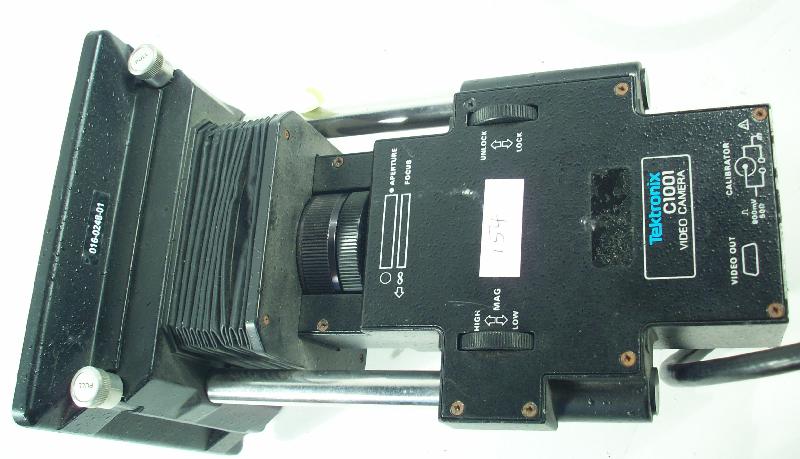
Tektronix marked a new way when they introduced the C1001 scope camera. It was an analog video camera intended to be conected to a video digitizer which allowed, among other things, to store digital pictures of the screen waveforms.

A Tektronix C1001 scope video camera
So now the way was to use a digital
camera, a second hand
old
model could be right, since I didn't need a large
resolution and I
could keep the camera dedicated to this function and
modify it if
needed.
The support frame
The first problem was how to mount
the camera, some kind
of hood is needed to avoid the ambient light which causes
reflections
in the screen,
and soon your conclusion is that you need something like
what Tek made
for their film cameras.
I tried to buy a surplus Tek scope
camera, prefereably
one in bad condition, since my intention was to use just
the
carcass,
and a
non functional camera could be bought very cheap.
Well, this
can
be
true
if
you
live
in
the
USA,
but
I
am
in
Europe
and
the
shipping
costs
are
quite
high.
Also
a
lot
of
surplus cameras have problems
like missing
scope adapters or broken
frames. The solution was to find something that
could be adapted
without
extensive work, probably less than adapt a real scope
camera.

My first candidate
My
first
candidate was a spent container of swimming pool
winterizer.
Even it was close to Tek Blue !!!.
Unfortunately it was too
big
and interfered with the scope controls.
After considering starting from scratch (somebody that I don't remember now made one using printed circuit board material), finally I found a flowerpot with almost the exact dimensions for the 7000 series scopes. In fact, when I started this project my target scope was a 465, but now that I have a pair of 7000 series, the on-screen readout is something invaluable for a picture and since the bezel dimensions are not compatible, I choose to make the camera for them.
The
flower
shop had no any "Tek blue" pot remaining, so I bought a
violet pair ($2
ea.) and when everything is finished maybe I will paint
it in
the matching
color.

The
choosen
shroud:
a
cute
flowerpot
The size is almost perfect, 14 cm square but since the scope bezel is not square and it is almost touching with the plug-in bays, it is neccesary to attach the shroud flush with the lower side, leaving all the clearance at the top. To close this space to block the light and to double it as a mounting rail, I glued a black plastic piece of about 15 mm wide to the inside of the top, recessed about 5 mm. It has a L form and was made in two pieces cut from an old audio cassette box. This rail provides a solid hold to the scope and since the camera is very light I don't care about a safe latch in the low side.
Detail
of
the
attaching
rail
The camera
Then
came
his turn to the camera. Before buying one I did
many tests
with several current models, but I found that most of
them have no
video output beeing this an important thing, because you
want to see
what is happening on the screen and the best way is to
use your
computer monitor,
the usual camera screen is quite small for this.
In the models
that do have this
output, the video was analog, as is was intended to show
your pictures
and videos
on the TV, so you need to digitize it, a step back to
the times of
the
C1001. Also when taking pictures you have to push
the trigger
button, normally there is not a remoting facility (I'm
talking about
the
common compact cameras, not the expensive reflex
ones). Soon I
realized that I wanted a kind of digital video camera
that could be
connected to the computer and controlled from there: a
webcam.
I recovered an old (5 years?) combination of USB memory stick, video and still pictures camera and even a voice recorder. It was made by Verbatim , the model is "5-in-1 store'n'go" and I got it as a merchadising gift. The maximum resolution is 640 x 480, but it has its advantages, I don't need to resample the images later to decrease its size.
The camera is supported by the
Windows XP
Webcam utility once you install
its drivers.
This
utility
allows
you
to
see
the
video
image
and
take
snapshots
just
by
clicking
a
soft
key.
The
pictures
are
consecutively
stored
in a
folder and can be retrieved using the same
utility. Usually when
you buy a webcam it also includes a program for doing
these and
even more
functions, and most of them are able to work with any
Windows supported
camera, not only the models from its maker. This
is interesting
because if you try some of them you can find the
one that best
suit your needs. Some of them offer
capabilities not found
in others, like camera adjustments, image mirroring and
so on.
These programs can
be
freely downloaded from the Web sites of most camera
manufacturers. In my case they are at http://www.verbatim-europe.co.uk/en_1/article_5-in-1-storengo_1638_0.html
and their control program, named DirectCap, have good
camera
adjustments.
Microsoft includes an equivalent program named AMCAP in
Windows
XP.
This peculiar camera lacked a proper mount, the
package included
a kind of gooseneck semi flexible USB cable,
intended to both
hold the camera and provide
its connection and was totally unsuitable for fixing
it to the hood, so I had to find a way to attach the
camera that
provides some degree of adjustment.
Other problem is the focus, this camera was of the
fixed type
with bad focus at close distance, but in the inners the
lens have a
focus adjustment with enough range to the distance
needed. The
problem was that it was glued in the standard position
and it was very
difficult to free it.
This is my prototype, a kind of test bench where I can
adjust the
camera position and attitude, and verify if
the camera was
able to
take good scope pictures. Once verified and found
the right
position, it
will use a more definitive fixture.
The first prototype
The prototype consist in the flowerpot hood with a
oversized view
hole and a
piece of plastic for attaching the camera.
This piece has a
hole on its center where the camera lens is press fit
(really with the
help of some paper shim) so it can be rotated around its
axis, and the
piece is taped to the hood after finding the right
position.
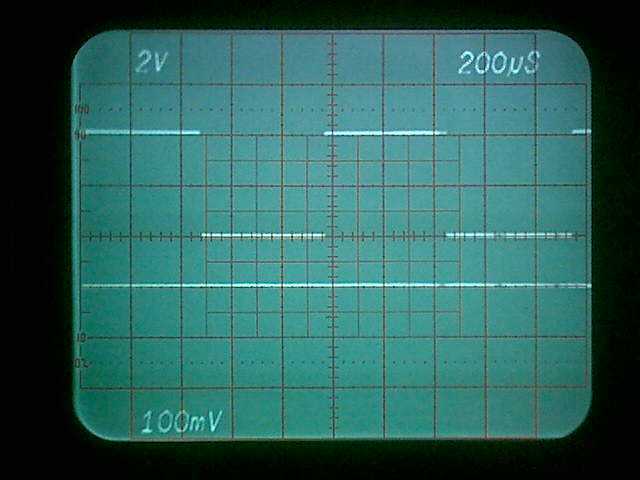
And this is the first ficture after finding the right
aligment. The scope is a Tek 7623A bought "as is" that I
just
restored.
My Scopecamera "First light"
Operation
Using the camera control programs above mentioned you
can watch on
real time the scope screen in the computer and, when the
signal is
fairly repetitive, take as many snapshots as you want
. For low
rep
rate or one shot events take a video clip (the CRT and
camera
persistence helps a lot) and select the frames that
you like with a video editor, instead of trying to
synchronize the
scope
and the camera, which is very difficult. If
your scope has
storage you can use this feature and you don't need the
video.
The
"Definitive"
fixture:
In fact I won't need to take many scope pictures, and the prototype is good enough for ocasional use, but it is delicate and prone to misaligment. Now that I have it working I want to finish it in such way that it will work ok at the first try when I need it, so I have to build something that is solid enough and with some adjustment range. It has to hold the camera in a solid and repetable way and be able to withstand the cable plug and unplug without disturbing the aligment too much. And hopefully it must have a good look.
My first idea was to trim the plastic support to an
adequate size,
glue the camera to it and fix the support to the hood
with 4
screws or even glue it.
Simple, isn't it?
Well, the screws must permit some tilt adjustment,
because these
cameras are far from being a precission thing, and the
optical axis is
not perpendicular to the case, because the lens holder
is just glued to
the
sensor and it has some tilt.
Since the camera housing is totally curved without
flat surfaces, I
think that one
solution is to glue to it 3 or 4 plastic tabs and attach
them with
long screws to a plate and later screw this plate to the
hood. A spring
surrounding each long screw can provide a good means of
tilt adjustment
and
the plate and hood can have slotted holes to provide
lateral
play. I have to elaborate it more, and probably
I'll try the
simple
glue method and see if it is solid enough, I will have
to care the
aligment using
shims or wedges during the glue setting.
A suitable cover will provide the "good look".
I will update this page as works progress. And if anybody want any aditional info, just email me.
11-05-2010
Some advice:
While the project is not finished yet, I can give some
advice to
the prospective builders.
- The body:
I
think that the flower pot that I used is the ideal
thing, because the
dimensions are right and it is made from high
quality
material. It should be not very difficult to find
something alike
and of course the dimensions should be the adecuate for
the scope you
plan to use. For a series 7000 the side should be
14 cm (5 1/2")
and for a series 400, 12 cm (4 3/4"). While the
flower pots are
square this is not a problem, as shown. The
mounting rail also
serves for filling the vertical clearance and shields
the light.
A very narrow rail should be made from metal.
- The camera:
If you
have to buy one, be sure about 2 things, the mount and
the focus
adjustment. Check that there is something to
fix it (a
thread, etc.) and that there is a base which allows for
aligment,. The aligment should be made quite
permanent.
This will ease
the fixing to the body without having to make
yourself the
aligment system.
About the focus, if the camera has an adjustable
one it saves
you a lot of headaches, because you need to adjust it to
near distance,
and if the camera is of the fixed focus type you will
need to open it
and who knows what you will find there.
In the other hand, if you want to
recycle your old webcam be ready to work harder, as I
did.
11-09-2010
I tried just to glue
everything and
I'm satisfied with the results. I used a hot glue
gun so I could
make some adjustments while the glue was setting.
The final
result
could be more fancy but it is enough for me, The only
remaining thing
that maybe I'll do is some painting.
Mi
camera
in the last version


